「OpenLiteSpeedで構築したサイトをSSL化したい」
「無料でSSL証明書発行が可能なLet’s Encryptを利用したい」
このような場合には、この記事の内容が参考となります。
この記事では、OpenLiteSpeedのサイトをSSL化する方法を解説しています。
本記事の内容
- Let’s EncryptからのSSL証明書発行
- OpenLiteSpeedにおけるSSL証明書の適用
それでは、上記に沿って解説していきます。
Let’s EncryptからのSSL証明書発行
Let’s EncryptからSSL証明書を発行します。
その手順は、以下の3つに分けることができます。
- Certbotのインストール
- CertbotによるSSL証明の発行
- Certbotの自動起動設定
それぞれを下記で説明します。
Certbotのインストール
Certbot公式
https://certbot.eff.org/
Certbotは、Let’s Encryptから証明書を取得するツールです。
certbotパッケージの内容を確認します。
$ sudo apt info certbot
Package: certbot
Version: 0.40.0-1ubuntu0.1
Priority: extra
Section: universe/web
Source: python-certbot
Origin: Ubuntu
Maintainer: Ubuntu Developers <ubuntu-devel-discuss@lists.ubuntu.com>
Original-Maintainer: Debian Let's Encrypt <team+letsencrypt@tracker.debian.org>
Bugs: https://bugs.launchpad.net/ubuntu/+filebug
Installed-Size: 51.2 kB
Provides: letsencrypt
Depends: python3-certbot (= 0.40.0-1ubuntu0.1), python3:any
Suggests: python3-certbot-apache, python3-certbot-nginx, python-certbot-doc
Breaks: letsencrypt (<= 0.6.0)
Replaces: letsencrypt
Homepage: https://certbot.eff.org/
Download-Size: 17.9 kB
APT-Sources: http://archive.ubuntu.com/ubuntu focal-updates/universe amd64 Packages
Description: automatically configure HTTPS using Let's Encrypt
 The objective of Certbot, Let's Encrypt, and the ACME (Automated
 Certificate Management Environment) protocol is to make it possible
 to set up an HTTPS server and have it automatically obtain a
 browser-trusted certificate, without any human intervention. This is
 accomplished by running a certificate management agent on the web
 server.
 .
 This agent is used to:
 .
   - Automatically prove to the Let's Encrypt CA that you control the website
   - Obtain a browser-trusted certificate and set it up on your web server
   - Keep track of when your certificate is going to expire, and renew it
   - Help you revoke the certificate if that ever becomes necessary.
 .
 This package contains the main application, including the standalone
 and the manual authenticators.
Let’s Encryptを利用する上では、Certbotは必須となります。
次のコマンドを実行して、Certbotをインストールします。
sudo apt-get update
sudo apt-get install certbot -y
CertbotによるSSL証明の発行
非対話形式であれば、次のコマンドを利用します。
certbot certonly --non-interactive --agree-tos -m メールアドレス --webroot -w ルートディレクトリ -d ドメイン
今回は、次の方法でインストールしたサイトにSSLを設定します。

用いたコマンドは、以下となります。
sudo certbot certonly --non-interactive --agree-tos -m test@gmail.com --webroot -w /usr/local/lsws/wordpress -d test-1click.com
コマンドを実行した結果は、以下。
$ sudo certbot certonly --non-interactive --agree-tos -m test@gmail.com --webroot -w /usr/local/lsws/wordpress -d test-1click.com
Saving debug log to /var/log/letsencrypt/letsencrypt.log
Plugins selected: Authenticator webroot, Installer None
Obtaining a new certificate
Performing the following challenges:
http-01 challenge for test-1click.com
Using the webroot path /usr/local/lsws/wordpress for all unmatched domains.
Waiting for verification...
Cleaning up challenges

IMPORTANT NOTES:
 - Congratulations! Your certificate and chain have been saved at:
   /etc/letsencrypt/live/test-1click.com/fullchain.pem
   Your key file has been saved at:
   /etc/letsencrypt/live/test-1click.com/privkey.pem
   Your cert will expire on 2022-04-08. To obtain a new or tweaked
   version of this certificate in the future, simply run certbot
   again. To non-interactively renew *all* of your certificates, run
   "certbot renew"
 - Your account credentials have been saved in your Certbot
   configuration directory at /etc/letsencrypt. You should make a
   secure backup of this folder now. This configuration directory will
   also contain certificates and private keys obtained by Certbot so
   making regular backups of this folder is ideal.
 - If you like Certbot, please consider supporting our work by:

   Donating to ISRG / Let's Encrypt:   https://letsencrypt.org/donate
   Donating to EFF:                    https://eff.org/donate-le
「IMPORTANT NOTES」に注目します。
この箇所において、次の2つのファイルパスをメモしておきましょう。
- /etc/letsencrypt/live/test-1click.com/privkey.pem
- /etc/letsencrypt/live/test-1click.com/fullchain.pem
これらは、秘密鍵と証明書のフルパスです。
もちろん、ドメイン部分は各自の環境で異なります。
Certbotの自動起動設定
Let’s Encryptで発行した証明書の期限は、90日です。
そのため、定期的に証明書の更新が必要となります。
具体的には、「certbot -q renew」コマンドを実行しないといけません。
でも、そんな面倒なことはやってられません。
そもそも、人がやると忘れます。
ということで、Certbotのインストール時に自動起動設定が行われています。
次のファイルが新規で作成されています。
/etc/cron.d/certbot
# /etc/cron.d/certbot: crontab entries for the certbot package
#
# Upstream recommends attempting renewal twice a day
#
# Eventually, this will be an opportunity to validate certificates
# haven't been revoked, etc.  Renewal will only occur if expiration
# is within 30 days.
#
# Important Note!  This cronjob will NOT be executed if you are
# running systemd as your init system.  If you are running systemd,
# the cronjob.timer function takes precedence over this cronjob.  For
# more details, see the systemd.timer manpage, or use systemctl show
# certbot.timer.
SHELL=/bin/sh
PATH=/usr/local/sbin:/usr/local/bin:/sbin:/bin:/usr/sbin:/usr/bin

0 */12 * * * root test -x /usr/bin/certbot -a \! -d /run/systemd/system && perl -e 'sleep int(rand(43200))' && certbot -q renew
よって、特に私たちが何かする必要はありません。
上記ファイルの存在をチェックするだけでOKです。
以上、Let’s EncryptからのSSL証明書発行について説明しました。
次は、OpenLiteSpeedのSSLに関する設定を行います。
OpenLiteSpeedにおけるSSL証明書の適用
Let’s Encryptから発行した証明書を適用していきます。
OpenLiteSpeedには、ブラウザでアクセスできるWeb管理ツール(WebAdmin)が用意されています。
WebAdminを用いて、SSL証明書の適用を行います。
その際の手順を次のように分けます。
- WebAdminのアカウント設定
- WebAdminを使ったSSL証明書の適用
それぞれを下記で説明します。
WebAdminのアカウント設定
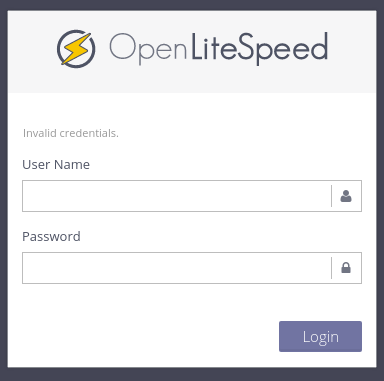
WebツールのURLは、「http://ドメイン:7080/」です。
ポート7080でWebツールが動いています。
今回であれば、「http://test-1click.com:7080/」となります。
このURLにアクセスすると、次のようなログイン画面を確認できます。
このツールのアカウントは、次のコマンドで作成します。
sudo /usr/local/lsws/admin/misc/admpass.sh
「User Name」と「Password」を入力して、アカウントを作成できます。
次のように表示されたら、アカウント設定は完了です。
Administrator's username/password is updated successfully!
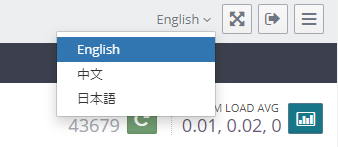
ログインして確認しましょう。
ログインできたら、日本語に変更しておきます。
WebAdminを使ったSSL証明書の適用
リスナーを表示させます。
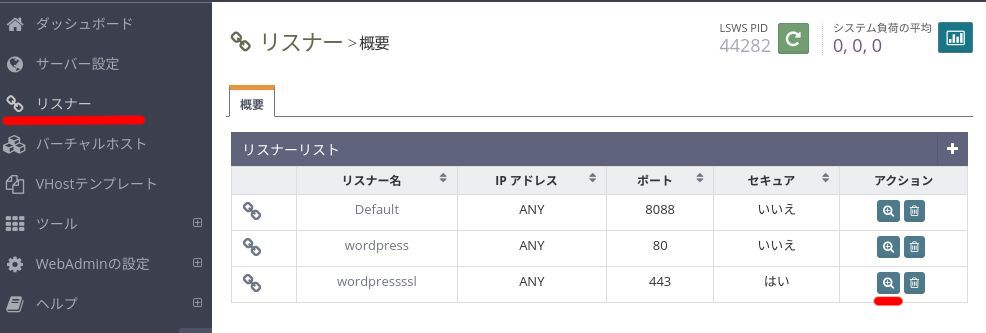
ここで、ポート443の「wordpressssl」を選択(虫眼鏡をクリック)。
選択したリスナーの詳細が表示。
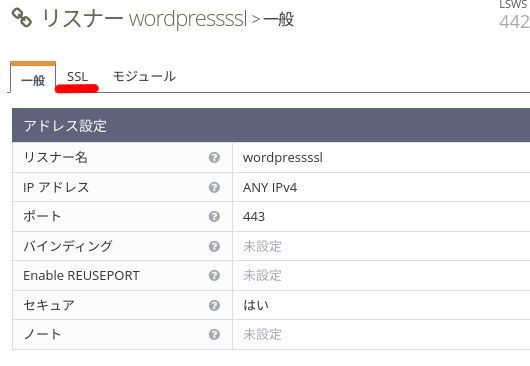
「SSL」タブをクリック。
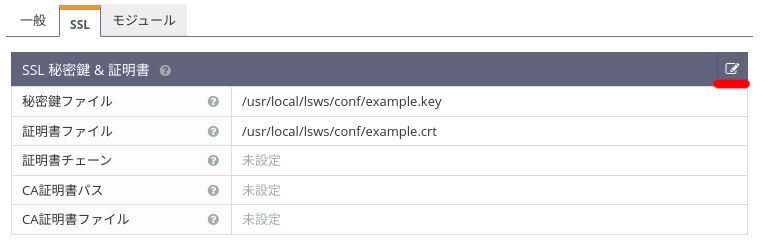
秘密鍵と証明書のパスを変更します。
「編集」アイコンをクリック。
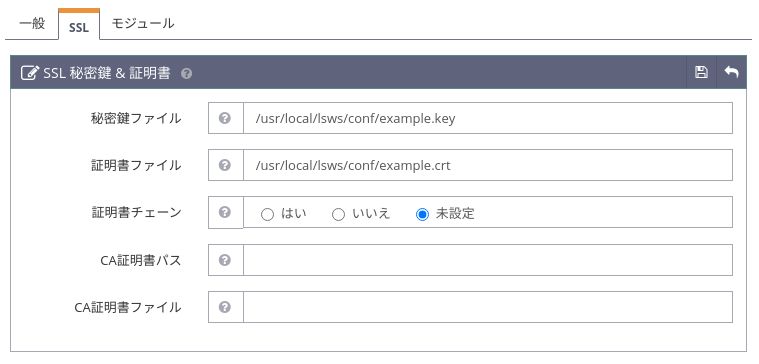
「秘密鍵ファイル」と「証明書ファイル」の値を変更します。
それぞれ、「CertbotによるSSL証明の発行」で作成したファイルのパスを入力します。
また、「証明書チェーン」は「はい」を選択します。
設定が完了したら、「保存」アイコンをクリック。

保存が完了して、次のような表示が現れます。
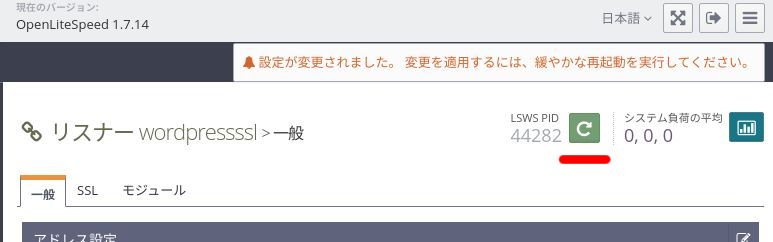
「緩やかな再起動」は、「再起動」アイコンをクリックして行います。
アイコンをクリックすると、確認画面が表示されます。
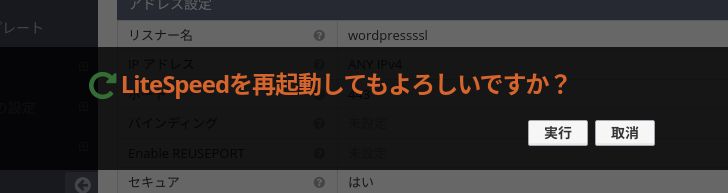
「実行」ボタンをクリック。
「緩やかな再起動」はすぐに終わります。
最後は、「https://ドメイン/」にアクセスして確認します。
SSL証明書が反映されていれば、設定は完了です。
もし上手くいかない場合は、ポート443の状況を確認しましょう。
ポート開放しないと、アクセスはできません。
OpenLiteSpeedにおけるSSL証明書の適用についての説明でした。