
現代のPHP開発では、品質の高いコードを迅速に提供することが求められています。
しかし、複雑化する開発プロセスの中で、効率よくコードの品質を保つことは容易ではありません。
ここで重要な役割を果たすのが、コード解析ツールです。
その中でも、PHP-ParserはPHPコードの解析を根本から変えるポテンシャルを持っています。
このツールは、コードを抽象構文木(AST)に変換し、コードの構造を深く理解するための基盤を提供します。
この記事では、PHP-Parserのインストール方法から、基本的な使用方法について解説します。
本記事の内容
- PHP-Parserとは?
- PHP-Parserのインストール
- PHP-Parserの動作確認
それでは、上記に沿って解説していきます。
PHP-Parserとは?
PHP-Parserは、PHPコードを解析し、その構造を理解するためのツールです。
具体的には、PHPのソースコードを抽象構文木(Abstract Syntax Tree、AST)に変換します。
ASTは、ソースコードの構造を木の形で表したものです。
それにより、プログラムの構文的構造を詳細に表現します。
イメージするなら、以下。
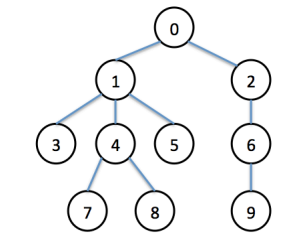
コード生成に必要のない部分を除去して、構造だけを抽出したモノと言えます。
PHP-Parserは、PHP自体で書かれているため、PHP開発者にとっては特に便利なツールです。
ソースコードからASTを生成することで、開発者はコードの解析や変換をより容易に行えるようになります。
また、コードの理解を深めるための教育ツールとしても有用です。
PHP-Parserはオープンソースプロジェクトとして公開されており、GitHubなどでソースコードを入手できます。
このツールを使うことで、次のような開発作業を支援することが可能です。
- コードのリファクタリング
- セキュリティ監査
- スタイルチェック
PHP-Parserのインストール
PHP-Parserのインストールには、Composerが必要となります。
Composerについては、次の記事で解説しています。

一般的には、次のコマンドでインストールすることになります。
composer require --dev nikic/php-parser
インストールできたら、以下のコマンドを実行してみましょう。
.\vendor\bin\php-parse -h
コマンドラインツールとして利用する場合のヘルプが表示されます。
>  .\vendor\bin\php-parse -h
Usage: php-parse [operations] file1.php [file2.php ...]
   or: php-parse [operations] "<?php code"
Turn PHP source code into an abstract syntax tree.

Operations is a list of the following options (--dump by default):

    -d, --dump              Dump nodes using NodeDumper
    -p, --pretty-print      Pretty print file using PrettyPrinter\Standard
    -j, --json-dump         Print json_encode() result
        --var-dump          var_dump() nodes (for exact structure)
    -N, --resolve-names     Resolve names using NodeVisitor\NameResolver
    -c, --with-column-info  Show column-numbers for errors (if available)
    -P, --with-positions    Show positions in node dumps
    -r, --with-recovery     Use parsing with error recovery
        --version=VERSION   Target specific PHP version (default: newest)
    -h, --help              Display this page

Example:
    php-parse -d -p -N -d file.php

    Dumps nodes, pretty prints them, then resolves names and dumps them again.
PHP-Parserの動作確認
まず、解析するPHPファイルを用意します。
test.php
<?php

function test($foo)
{
    var_dump($foo);
}

?>
とりあえず、オプションは無しで実行。
.\vendor\bin\php-parse .\input.php
その結果、以下のように表示されます。
====> File .\input.php:
==> Node dump:
array(
    0: Stmt_Function(
        attrGroups: array(
        )
        byRef: false
        name: Identifier(
            name: test
        )
        params: array(
            0: Param(
                attrGroups: array(
                )
                flags: 0
                type: null
                byRef: false
                variadic: false
                var: Expr_Variable(
                    name: foo
                )
                default: null
            )
        )
        returnType: null
        stmts: array(
            0: Stmt_Expression(
                expr: Expr_FuncCall(
                    name: Name(
                        name: var_dump
                    )
                    args: array(
                        0: Arg(
                            name: null
                            value: Expr_Variable(
                                name: foo
                            )
                            byRef: false
                            unpack: false
                        )
                    )
                )
            )
        )
    )
)
この内容(AST)については、各自で調べてください。
もしくは、ChatGPTやClaudeに聞いてみましょう。
PHP-Parserはコマンドラインツールだけではなく、PHPのAPIとしても利用できます。
以下は、ASTを出力するシンプルなコードです。
script.php
<?php

require_once __DIR__ . '/vendor/autoload.php';

use PhpParser\Error;
use PhpParser\NodeDumper;
use PhpParser\ParserFactory;

// コマンドライン引数からファイルパスを取得
$filePath = $argv[1];

// ファイルが存在するか確認
if (!file_exists($filePath)) {
    echo "指定されたファイルが見つかりません: {$filePath}\n";
    exit(1);
}

// ファイルの内容を読み込む
$code = file_get_contents($filePath);

$parser = (new ParserFactory())->createForNewestSupportedVersion();
try {
    // ファイルの内容を構文解析
    $ast = $parser->parse($code);
} catch (Error $error) {
    echo "解析エラー: {$error->getMessage()}\n";
    return;
}

$dumper = new NodeDumper;
// ASTを出力
echo $dumper->dump($ast) . "\n";

?>
利用方法は、以下。
php script.php input.php
次のように実行すれば、結果がテキストファイルに保存されます。
php script.php input.php > ast.txt