「img2imgをWindowsなどのローカル環境で動かしたい」
「img2imgの使い方・やり方がわからない・・・」
このような場合には、この記事の内容が参考になります。
この記事では、ローカル環境でStable Diffusionのimg2imgを動かす方法を解説しています。
本記事の内容
- img2imgとは?
- img2imgのシステム要件
- img2imgの動作確認
- CUDA out of memory(GPUのメモリ不足)への対応
それでは、上記に沿って解説していきます。
img2imgとは?
Stable Diffusionは、テキストから画像を自動的に作成します。
これは、txt2imgと呼べます。
テキストから画像が作成できるなら、画像から画像も作成できるはずです。
無から有を作るより、有から有を作る方が容易と言えます。
txt2imgは、テキストからのみで画像を作成します。
img2imgは、画像とテキストから画像を作成するということです。
Stable Diffusionと言えば、txt2imgのイメージが先行しています。
しかし、img2imgの機能を備えてもいるのです。
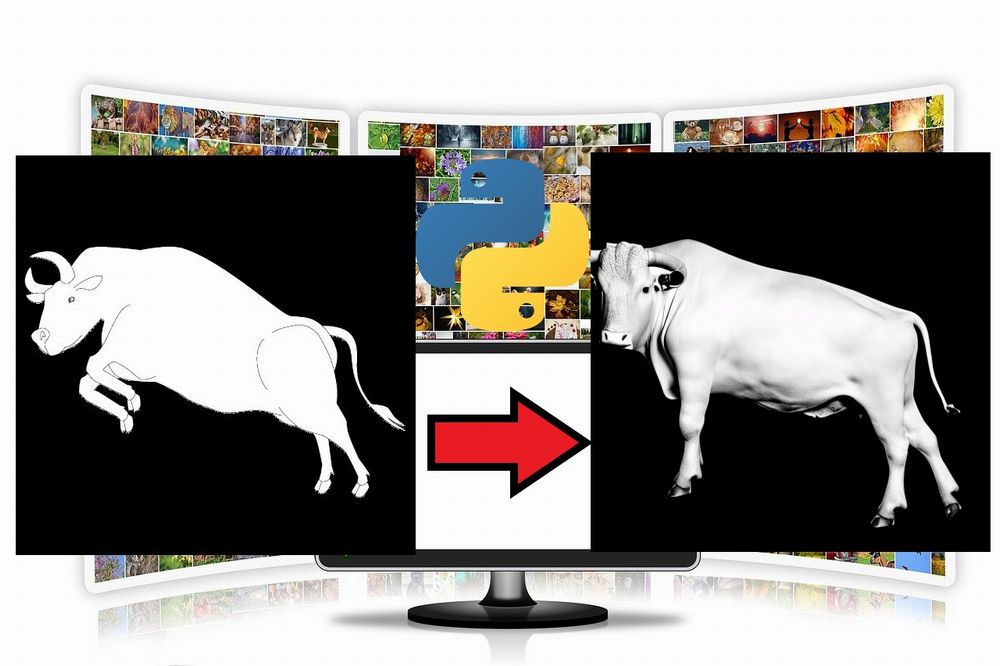
img2imgの機能を表現するときには、手書きの画像を使った事例があります。
例えば、次のような手書きの牛の画像があるとします。
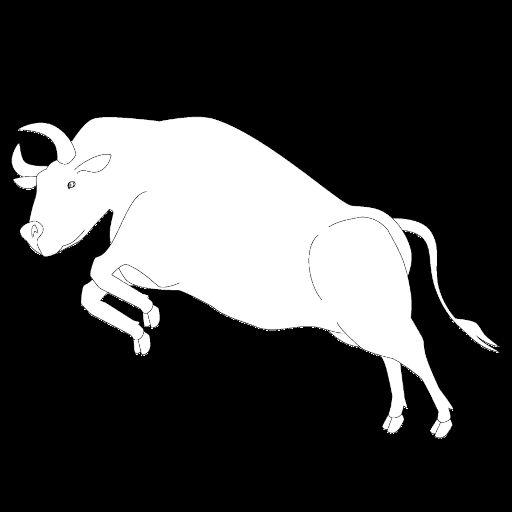
この手書きの牛の画像を、img2imgで次のような画像に変換できます。
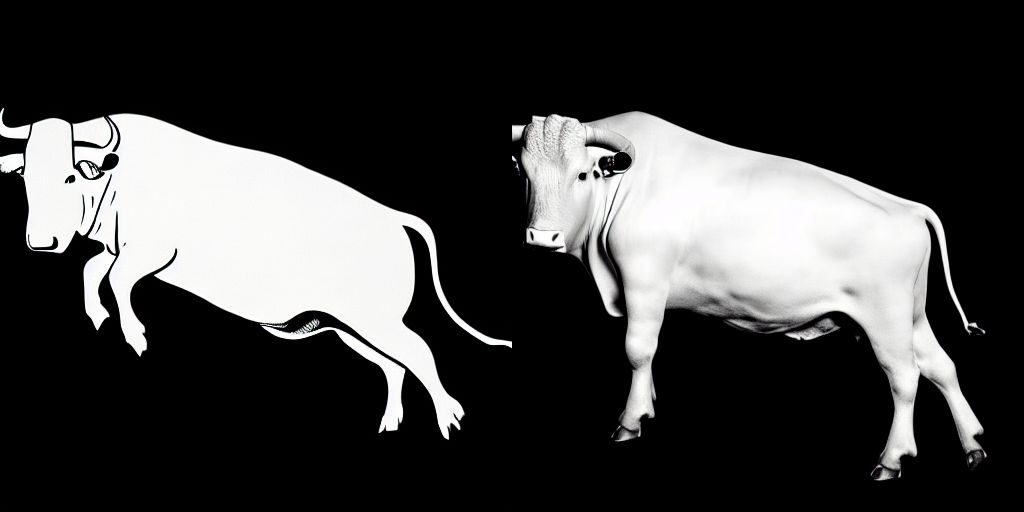
左は、手書きの牛を「bull(雄牛)」と指定した場合の変換画像です。
右は、左の牛をさらに写真風になるように指定した場合の変換画像になります。
こんなことが、個人でも行えるようになりました。
今後、この分野は進化する一方でしょうね。
以上、img2imgについて説明しました。
次は、img2imgのシステム要件を説明します。
img2imgのシステム要件
追記 2022年11月22日
現在では、GUIツールで簡単にimg2imgを実施することが可能です。

img2imgは、主に以下の方法で動かすことが可能です。
- コマンドラインツール
- Python API(モジュール)
このことは、Stable Diffusion自体のインストール方法と大きく関係があります。
そもそも、img2imgを利用するにはStable Diffusionが動くようにする必要があります。
Stable Diffusionが動くようにする方法は、大きく2つあります。
- 公式ツールを用いた方法
- Diffusersを用いた方法
このサイトでは、「Diffusersを用いた方法」を推奨しています。
ここで、img2imgとStable Diffusionにおける利用・インストール方法の関係をまとめましょう。
| img2imgの利用方法 | Stable Diffusionのインストール方法 |
| コマンドラインツール | 公式ツールを用いた方法 |
| Python API(モジュール) | Diffusersを用いた方法 |
Stable Diffusionは、まだまだ公開されたばかりの技術になります。
そのため、このあたりがよく整理されておらずに混乱しがちです。
また、img2imgの起動については、次の形式のコマンドを目にすることが多いでしょう。
python scripts/img2img.py --prompt "A fantasy landscape, trending on artstation" --init-img <path-to-img.jpg> --strength 0.8
しかし、このサイトでは「Diffusersを用いた方法」をオススメしています。
そのため、上記のコマンドラインツール(サンプルスクリプト)は利用しません。
したがって、この記事で説明するimg2imgのシステム要件は以下となります。
「Diffusersを用いた方法でStable Diffusionをインストールすること」
その方法については、次の記事で解説しています。
Stable Diffusionが動作することを確認できたら、img2imgの動作確認を行いましょう。
以上、img2imgのシステム要件を説明しました。
次は、img2imgの動作確認を説明します。
img2imgの動作確認
img2imgの動作確認を行います。
もちろん、Python API(モジュール)としてimg2imgを動かします。
追記 2022年9月11日
Diffusersのバージョンによっては、動作確認でエラーが出ます。
エラーが出る場合は、次の記事をご覧ください。

このAPIを利用して、コマンドラインツールを開発することも可能です。
コマンドラインツールと言っても、サンプルスクリプトに過ぎません。
Python APIとしての動作確認用のコードは、以下となります。
そのためのコードは、以下です。
import PIL
from PIL import Image
import numpy as np
import inspect
from typing import List, Optional, Union
import torch
from torch import autocast
from tqdm.auto import tqdm
from diffusers import (
    AutoencoderKL,
    DDIMScheduler,
    DiffusionPipeline,
    PNDMScheduler,
    UNet2DConditionModel,
)
from diffusers.pipelines.stable_diffusion import StableDiffusionSafetyChecker
from transformers import CLIPFeatureExtractor, CLIPTextModel, CLIPTokenizer


class StableDiffusionImg2ImgPipeline(DiffusionPipeline):
    def __init__(
            self,
            vae: AutoencoderKL,
            text_encoder: CLIPTextModel,
            tokenizer: CLIPTokenizer,
            unet: UNet2DConditionModel,
            scheduler: Union[DDIMScheduler, PNDMScheduler],
            safety_checker: StableDiffusionSafetyChecker,
            feature_extractor: CLIPFeatureExtractor,
    ):
        super().__init__()
        scheduler = scheduler.set_format("pt")
        self.register_modules(
            vae=vae,
            text_encoder=text_encoder,
            tokenizer=tokenizer,
            unet=unet,
            scheduler=scheduler,
            safety_checker=safety_checker,
            feature_extractor=feature_extractor,
        )

    @torch.no_grad()
    def __call__(
            self,
            prompt: Union[str, List[str]],
            init_image: torch.FloatTensor,
            strength: float = 0.8,
            num_inference_steps: Optional[int] = 50,
            guidance_scale: Optional[float] = 7.5,
            eta: Optional[float] = 0.0,
            generator: Optional[torch.Generator] = None,
            output_type: Optional[str] = "pil",
    ):

        if isinstance(prompt, str):
            batch_size = 1
        elif isinstance(prompt, list):
            batch_size = len(prompt)
        else:
            raise ValueError(f"`prompt` has to be of type `str` or `list` but is {type(prompt)}")

        if strength < 0 or strength > 1:
            raise ValueError(f'The value of strength should in [0.0, 1.0] but is {strength}')

        # set timesteps
        accepts_offset = "offset" in set(inspect.signature(self.scheduler.set_timesteps).parameters.keys())
        extra_set_kwargs = {}
        offset = 0
        if accepts_offset:
            offset = 1
            extra_set_kwargs["offset"] = 1

        self.scheduler.set_timesteps(num_inference_steps, **extra_set_kwargs)

        # encode the init image into latents and scale the latents
        init_latents = self.vae.encode(init_image.to(self.device)).sample()
        init_latents = 0.18215 * init_latents

        # prepare init_latents noise to latents
        init_latents = torch.cat([init_latents] * batch_size)

        # get the original timestep using init_timestep
        init_timestep = int(num_inference_steps * strength) + offset
        init_timestep = min(init_timestep, num_inference_steps)
        timesteps = self.scheduler.timesteps[-init_timestep]
        timesteps = torch.tensor([timesteps] * batch_size, dtype=torch.long, device=self.device)

        # add noise to latents using the timesteps
        noise = torch.randn(init_latents.shape, generator=generator, device=self.device)
        init_latents = self.scheduler.add_noise(init_latents, noise, timesteps)

        # get prompt text embeddings
        text_input = self.tokenizer(
            prompt,
            padding="max_length",
            max_length=self.tokenizer.model_max_length,
            truncation=True,
            return_tensors="pt",
        )
        text_embeddings = self.text_encoder(text_input.input_ids.to(self.device))[0]

        # here `guidance_scale` is defined analog to the guidance weight `w` of equation (2)
        # of the Imagen paper: https://arxiv.org/pdf/2205.11487.pdf . `guidance_scale = 1`
        # corresponds to doing no classifier free guidance.
        do_classifier_free_guidance = guidance_scale > 1.0
        # get unconditional embeddings for classifier free guidance
        if do_classifier_free_guidance:
            max_length = text_input.input_ids.shape[-1]
            uncond_input = self.tokenizer(
                [""] * batch_size, padding="max_length", max_length=max_length, return_tensors="pt"
            )
            uncond_embeddings = self.text_encoder(uncond_input.input_ids.to(self.device))[0]

            # For classifier free guidance, we need to do two forward passes.
            # Here we concatenate the unconditional and text embeddings into a single batch
            # to avoid doing two forward passes
            text_embeddings = torch.cat([uncond_embeddings, text_embeddings])

        # prepare extra kwargs for the scheduler step, since not all schedulers have the same signature
        # eta (η) is only used with the DDIMScheduler, it will be ignored for other schedulers.
        # eta corresponds to η in DDIM paper: https://arxiv.org/abs/2010.02502
        # and should be between [0, 1]
        accepts_eta = "eta" in set(inspect.signature(self.scheduler.step).parameters.keys())
        extra_step_kwargs = {}
        if accepts_eta:
            extra_step_kwargs["eta"] = eta

        latents = init_latents
        t_start = max(num_inference_steps - init_timestep + offset, 0)
        for i, t in tqdm(enumerate(self.scheduler.timesteps[t_start:])):
            # expand the latents if we are doing classifier free guidance
            latent_model_input = torch.cat([latents] * 2) if do_classifier_free_guidance else latents

            # predict the noise residual
            noise_pred = self.unet(latent_model_input, t, encoder_hidden_states=text_embeddings)["sample"]

            # perform guidance
            if do_classifier_free_guidance:
                noise_pred_uncond, noise_pred_text = noise_pred.chunk(2)
                noise_pred = noise_pred_uncond + guidance_scale * (noise_pred_text - noise_pred_uncond)

            # compute the previous noisy sample x_t -> x_t-1
            latents = self.scheduler.step(noise_pred, t, latents, **extra_step_kwargs)["prev_sample"]

        # scale and decode the image latents with vae
        latents = 1 / 0.18215 * latents
        image = self.vae.decode(latents)

        image = (image / 2 + 0.5).clamp(0, 1)
        image = image.cpu().permute(0, 2, 3, 1).numpy()

        # run safety checker
        safety_cheker_input = self.feature_extractor(self.numpy_to_pil(image), return_tensors="pt").to(self.device)
        image, has_nsfw_concept = self.safety_checker(images=image, clip_input=safety_cheker_input.pixel_values)

        if output_type == "pil":
            image = self.numpy_to_pil(image)

        return {"sample": image, "nsfw_content_detected": has_nsfw_concept}


def preprocess(image):
    w, h = image.size
    w, h = map(lambda x: x - x % 32, (w, h))  # resize to integer multiple of 32
    image = image.resize((w, h), resample=PIL.Image.LANCZOS)
    image = np.array(image).astype(np.float32) / 255.0
    image = image[None].transpose(0, 3, 1, 2)
    image = torch.from_numpy(image)
    return 2. * image - 1.


MODEL_ID = "CompVis/stable-diffusion-v1-4"
DEVICE = "cuda"
YOUR_TOKEN = "コピーしたアクセストークン"
BASE_IMG = "input.jpg"
PROMPT = "A fantasy landscape, trending on artstation"

scheduler = DDIMScheduler(beta_start=0.00085, beta_end=0.012, beta_schedule="scaled_linear", clip_sample=False,
                          set_alpha_to_one=False)
pipe = StableDiffusionImg2ImgPipeline.from_pretrained(
    MODEL_ID,
    scheduler=scheduler,
    revision="fp16",
    torch_dtype=torch.float16,
    use_auth_token=YOUR_TOKEN
).to(DEVICE)

init_img = Image.open(BASE_IMG)
#init_img = init_img.resize((512, 256))
init_image = preprocess(init_img)

generator = torch.Generator(device=DEVICE).manual_seed(1024)
with autocast(DEVICE):
    image = pipe(prompt=PROMPT, init_image=init_image, strength=0.8, guidance_scale=7.5,
                 generator=generator, num_inference_steps=100)["sample"][0]

    image.save("result.png")
このコードにおいて、以下の部分がポイントになります。
MODEL_ID = "CompVis/stable-diffusion-v1-4"
DEVICE = "cuda"
YOUR_TOKEN = "コピーしたアクセストークン"
BASE_IMG = "input.jpg"
PROMPT = "A fantasy landscape, trending on artstation"
Stable Diffusionの動作確認まで済みであれば、上の3つは馴染みがあるはずです。
ここでは、説明はしません。
説明すべきは、「BASE_IMG」と「PROMPT」ですね。
「BASE_IMG」には、変換元の画像パスを設定します。
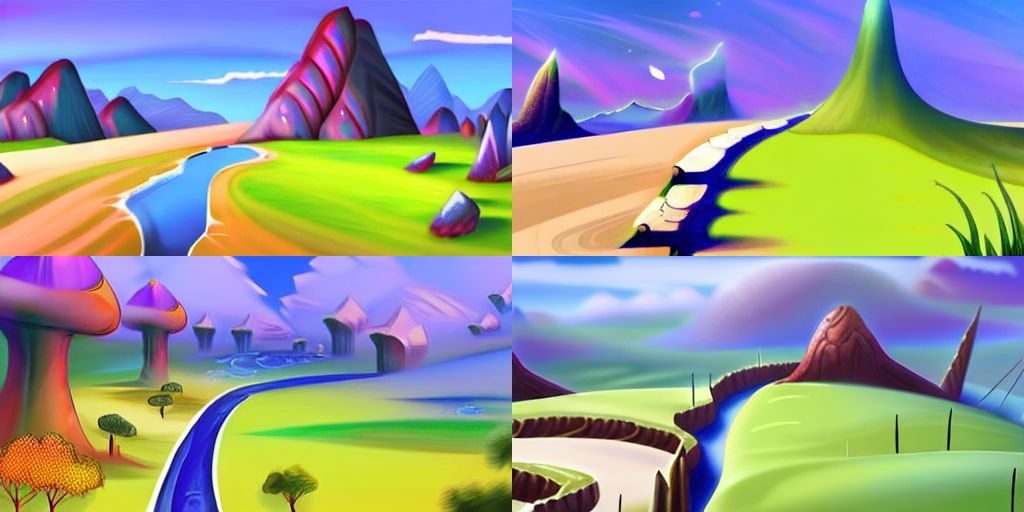
input.jpgは、コマンドラインツールであるimg2imgのデモで利用されている画像です。
input.jpg(1024×512)

「PROMPT」には、画像に加えたい内容を設定します。
Stable Diffusionにおける呪文ですね。
とりあえず、画像が配置できたらコードを実行します。
処理が順調に進めば、そのまま待ちましょう。
しかし、処理の途中で次のようなエラーが出る場合があります。
私の環境では、実際に出ました。
RuntimeError: CUDA out of memory. Tried to allocate 4.00 GiB (GPU 0; 8.00 GiB total capacity; 4.66 GiB already allocated; 1.45 GiB free; 4.76 GiB reserved in total by PyTorch) If reserved memory is >> allocated memory try setting max_split_size_mb to avoid fragmentation. See documentation for Memory Management and PYTORCH_CUDA_ALLOC_CONF
result.png
エラーが出た場合は、後述する「CUDA out of memory(GPUのメモリ不足)への対応」をご覧ください。
エラーが出なかった場合は、ディレクトリ上にresult.pngが存在することを確認します。

上記コードのままであれば、何度実行を繰り返しても同じ画像が作成されます。
「PROMPT」を変更せずに作成される画像を変えるには、次のコードにおけるseedを変更します。
generator = torch.Generator(device=DEVICE).manual_seed(1024)
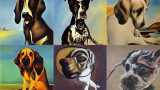
seedを変更すると、次のように様々な画像を確認できます。
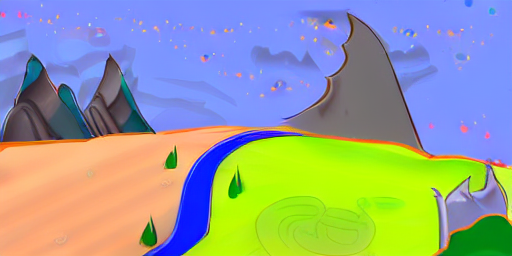
「PROMPT」の影響度は、以下コード部分における「strength」で設定します。
    image = pipe(prompt=PROMPT, init_image=init_image, strength=0.8, guidance_scale=7.5,
                 generator=generator, num_inference_steps=100)["sample"][0]
「strength」を0.3に設定した場合、次の画像が作成されました。
確かに、「PROMPT」の影響が薄れていることがわかります。
その他の引数も重要な要素になります。
思い通りの画像が作成されない場合には、その都度引数について調べてみればよいでしょう。
以上、img2imgの動作確認を説明しました。
次は、CUDA out of memory(GPUのメモリ不足)への対応を説明します。
CUDA out of memory(GPUのメモリ不足)への対応
CUDA out of memory(GPUのメモリ不足)への対応については、次の記事で説明しています。

「PYTORCH_CUDA_ALLOC_CONF」を設定するという内容です。
os.environ['PYTORCH_CUDA_ALLOC_CONF'] = "max_split_size_mb:500"
今回は、この対応ではダメでした。
環境によっては、エラーが出なくなるのかもしれません。
私の環境では、次の対応でエラーが出なくなりました。
init_img = init_img.resize((512, 256))
動作確認用のコード上では、コメントアウトしています。
このコードが機能することにより、エラーが出なくなりました。
やったことは、画像サイズを半分にしただけです。
画像サイズを小さくすることにより、GPUのメモリ不足を解消しています。
もちろん、出力される画像もリサイズしたサイズになります。
サイズが小さいと困るという方は、高画質化ツールの利用をオススメします。
以上、CUDA out of memory(GPUのメモリ不足)への対応を説明しました。