「各モデルの良いとこ取りした混合モデルを使ってみたい」
「高品質な画像を生成できるモデルを探している」
このような場合には、Protogen x5.8がオススメです。
この記事では、Protogen x5.8のついて解説しています。
本記事の内容
- Protogen x5.8とは?
- Protogen x5.8の利用方法
それでは、上記に沿って解説していきます。
Protogen x5.8とは?
Protogen x5.8 Rebuilt (Scifi+Anime) Official Release | Stable Diffusion Checkpoint | Civitai
https://civitai.com/models/3867/protogen-x58-rebuilt-scifianime-official-release
Protogen x5.8は、Protogen x3.4と同じ開発者が作成しているモデルです。
Protogen x3.4が公開されて、すぐにProtogen x5.8が公開されました。
その理由は、Dreamlike Photoreal 2.0にあります。

Dreamlike Photoreal 2.0にモデル開発者が惚れ込んだのです。
Dreamlike Photoreal 2.0の出来が良過ぎるために、新たにモデルを作ったという流れになります。
Dreamlike Photoreal 2.0をベースにして、以下モデルを結合したようです。
- 5% modelshoot-1.0
- 20% roboDiffusion_v1
- 20% MoistMix
- 20% HASDX
それぞれは、メジャーなモデルではありません。
でも、それらを上手く配合してProtogen x5.8を作成したということです。
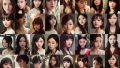
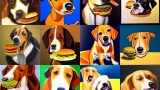
Civitai上のProtogen x5.8のページには、サンプル画像が複数用意されています。
THE アメリカという感じのサンプル画像が公開されています。
もちろん、綺麗な女性のサンプル画像もあります。
ほぼすべてのモデルにおいて、女性がサンプル画像として公開されています。
そのモデルの品質を示すのに、綺麗な女性の画像はわかりやすいからでしょうね。
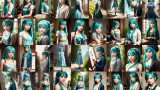
しかし、日本人からすると日本人を上手く描画できるかが重要です。
果たして、Protogen x5.8では日本人を上手く描けるのでしょうか?
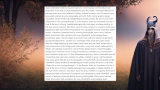
ある程度の試行錯誤により、次のような画像までは生成できました。
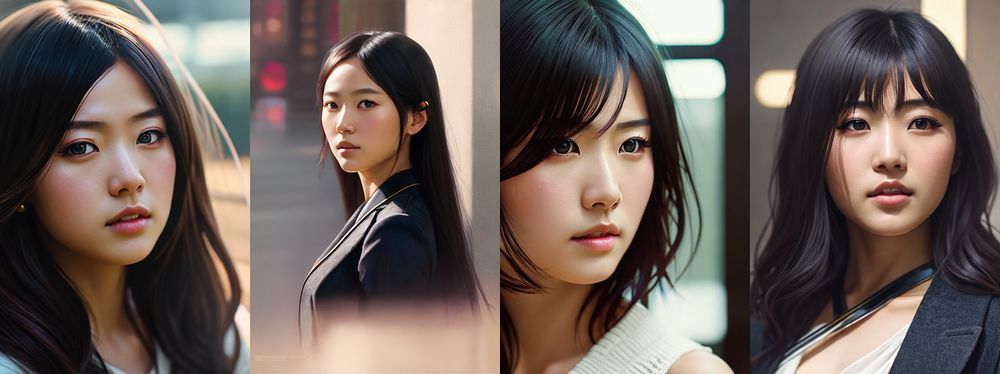
ただ、日本人の描画はベースモデルであるDreamlike Photoreal 2.0の方が簡単に感じました。
でも、プロンプトのタイプが合うか合わないかだけの問題かもしれません。
モデルによって、プロンプトの癖がありますからね。
そうは言っても、Protogen x5.8の生成する画像も質は高いです。
そもそも、ベースがDreamlike Photoreal 2.0だから当然かもしれません。
使いこなしていけば、混合モデルならではの良さが出てくる可能性があります。
以上、Protogen x5.8について説明しました。
次は、Protogen x5.8の利用方法を説明します。
Protogen x5.8の利用方法
Stable Diffusionを動かせる環境が、大前提となります。
Google Colabではなくローカル環境で動かす場合は、次の記事が参考になります。
上記記事に従えば、Diffusersをインストールします。
この記事では、Diffusersでの利用を対象としています。
Stable Diffusion web UI(AUTOMATIC1111版)だと、ここで説明する必要がありません。
まずは、モデルのダウンロードを行いましょう。
ダウンロードは、先ほど紹介したCivitai上のページから行います。
ページにアクセスして、次のボタンでダウンロードするファイルを選択します。
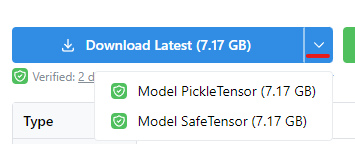
セキュリティを意識するなら、Safetensor形式となります。
ここでは、両方の形式に対応した方法を紹介しておきます。
Pickle形式
Safetensor形式

ちなみに、私は次のコマンドを用いました。
python convert_diffusers20_original_sd.py ..\..\ckpt\protogenX58RebuiltSc_10.safetensors ..\..\model\pro58 --v1 --reference_model runwayml/stable-diffusion-v1-5
Safetensor形式をダウンロードして、Diffusersモデルに変換しています。
では、変換できたモデルを利用してみましょう。
コードは、以下を利用します。
from diffusers import StableDiffusionPipeline, KDPM2AncestralDiscreteScheduler

model_id = "./model/pro58"
device = "cuda"

pipe = StableDiffusionPipeline.from_pretrained(model_id, custom_pipeline="lpw_stable_diffusion")
pipe.scheduler = KDPM2AncestralDiscreteScheduler.from_config(pipe.scheduler.config)
pipe = pipe.to(device)

prompt = "modelshoot style, (extremely detailed 8k wallpaper), block paint depicting a character in a cyberpunk street, posed character design study, backlit, light rays, highly detailed, trending on artstation"
negative_prompt = "nude, naked, 3d, 3d render, b&w, bad anatomy, bad anatomy, bad anatomy, bad art, bad art, bad proportions, blurry, blurry, blurry, body out of frame, canvas frame, cartoon, cloned face, close up, cross-eye, deformed, deformed, deformed, disfigured, disfigured, disfigured, duplicate, extra arms, extra arms, extra fingers, extra legs, extra legs, extra limbs, extra limbs, extra limbs, extra limbs, fused fingers, gross proportions, long neck, malformed limbs, missing arms, missing legs, morbid, mutated, mutated hands, mutated hands, mutation, mutation, mutilated, out of frame, out of frame, out of frame, Photoshop, poorly drawn face, poorly drawn face, poorly drawn feet, poorly drawn hands, poorly drawn hands, tiling, too many fingers, video game, weird colors"

image = pipe(
    prompt,
    num_inference_steps=30,
    guidance_scale=10,
    width=512,
    height=768,
    negative_prompt=negative_prompt,
    max_embeddings_multiples=2
).images[0]

image.save("test.png")
上記を実行すると、次のような画像が生成されます。
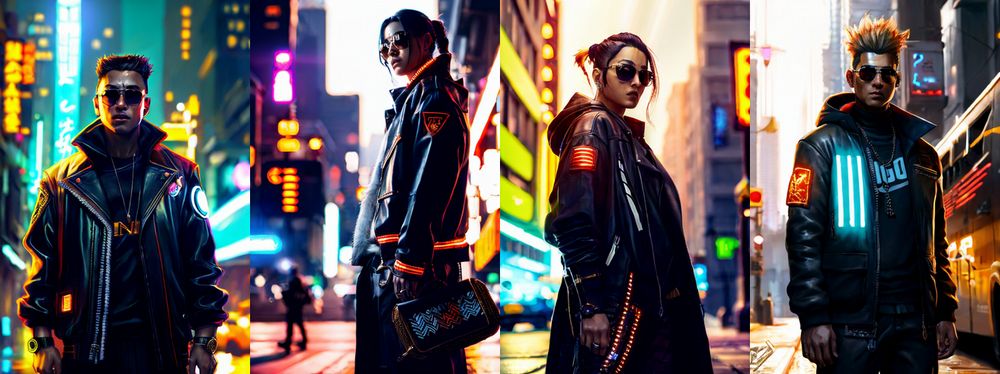
ここで利用したプロンプトは、公式の投稿を参考にしています。
Civitai上の公式ページの画像には、「i」と付いているモノがあります。

これをクリックすると、次のような情報が表示されます。
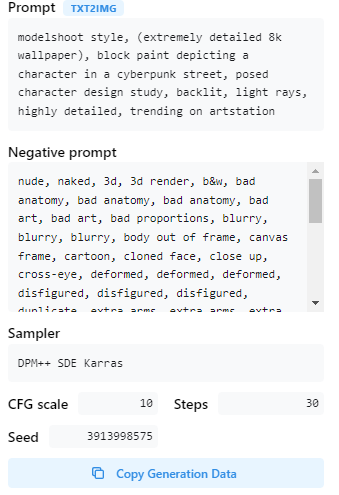
「Copy Generation Data」をクリックすれば、テキストをコピーできます。
ユーザー投稿などを参考にすることも可能です。
また、プロンプトが長いため「lpw_stable_diffusion」を利用しています。
長いプロンプトに対応する方法は、次の記事で解説しています。
以上、Protogen x5.8の利用方法を説明しました。