「LoRAによる追加学習を試したい」
「WindowsでLoRAによる学習が実行できない・・・」
このような場合には、この記事の内容が参考になります。
この記事では、LoRAによる追加学習について解説しています。
本記事の内容
- LoRAによる追加学習
- LoRAによる追加学習の効果
- WindowsでLoRAによる追加学習ができない!?
それでは、上記に沿って解説していきます。
LoRAによる追加学習
LoRAについては、次の記事で解説しています。
インストールして動作確認までは、実施しておいてください。

LoRAによる追加学習は、基本的にはDreamBoothと同じです。
そのため、不明点がある場合は次の記事を参考にしてください。

では、LoRAによる追加学習を行っていきます。
まずは、LoRAのリポジトリルートまで移動します。
そこでは、次のファイルを確認できます。
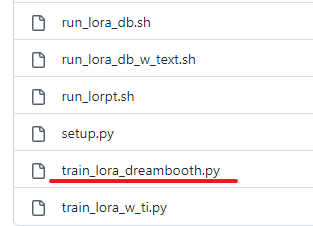
「train_lora_dreambooth.py」を用いて、追加学習を実行できます。
まずは、ヘルプを確認しましょう。
> accelerate launch train_lora_dreambooth.py -h
usage: train_lora_dreambooth.py [-h] --pretrained_model_name_or_path PRETRAINED_MODEL_NAME_OR_PATH [--pretrained_vae_name_or_path PRETRAINED_VAE_NAME_OR_PATH]
                                [--revision REVISION] [--tokenizer_name TOKENIZER_NAME] --instance_data_dir INSTANCE_DATA_DIR [--class_data_dir CLASS_DATA_DIR]
                                --instance_prompt INSTANCE_PROMPT [--class_prompt CLASS_PROMPT] [--with_prior_preservation] [--prior_loss_weight PRIOR_LOSS_WEIGHT]
                                [--num_class_images NUM_CLASS_IMAGES] [--output_dir OUTPUT_DIR] [--seed SEED] [--resolution RESOLUTION] [--center_crop]
                                [--color_jitter] [--train_text_encoder] [--train_batch_size TRAIN_BATCH_SIZE] [--sample_batch_size SAMPLE_BATCH_SIZE]
                                [--num_train_epochs NUM_TRAIN_EPOCHS] [--max_train_steps MAX_TRAIN_STEPS] [--save_steps SAVE_STEPS]
                                [--gradient_accumulation_steps GRADIENT_ACCUMULATION_STEPS] [--gradient_checkpointing] [--lora_rank LORA_RANK]
                                [--learning_rate LEARNING_RATE] [--learning_rate_text LEARNING_RATE_TEXT] [--scale_lr] [--lr_scheduler LR_SCHEDULER]
                                [--lr_warmup_steps LR_WARMUP_STEPS] [--use_8bit_adam] [--adam_beta1 ADAM_BETA1] [--adam_beta2 ADAM_BETA2]
                                [--adam_weight_decay ADAM_WEIGHT_DECAY] [--adam_epsilon ADAM_EPSILON] [--max_grad_norm MAX_GRAD_NORM] [--push_to_hub]
                                [--hub_token HUB_TOKEN] [--logging_dir LOGGING_DIR] [--mixed_precision {no,fp16,bf16}] [--local_rank LOCAL_RANK]
                                [--resume_unet RESUME_UNET] [--resume_text_encoder RESUME_TEXT_ENCODER]

Simple example of a training script.

options:
  -h, --help            show this help message and exit
  --pretrained_model_name_or_path PRETRAINED_MODEL_NAME_OR_PATH
                        Path to pretrained model or model identifier from huggingface.co/models.
  --pretrained_vae_name_or_path PRETRAINED_VAE_NAME_OR_PATH
                        Path to pretrained vae or vae identifier from huggingface.co/models.
  --revision REVISION   Revision of pretrained model identifier from huggingface.co/models.
  --tokenizer_name TOKENIZER_NAME
                        Pretrained tokenizer name or path if not the same as model_name
  --instance_data_dir INSTANCE_DATA_DIR
                        A folder containing the training data of instance images.
  --class_data_dir CLASS_DATA_DIR
                        A folder containing the training data of class images.
  --instance_prompt INSTANCE_PROMPT
                        The prompt with identifier specifying the instance
  --class_prompt CLASS_PROMPT
                        The prompt to specify images in the same class as provided instance images.
  --with_prior_preservation
                        Flag to add prior preservation loss.
  --prior_loss_weight PRIOR_LOSS_WEIGHT
                        The weight of prior preservation loss.
  --num_class_images NUM_CLASS_IMAGES
                        Minimal class images for prior preservation loss. If not have enough images, additional images will be sampled with class_prompt.
  --output_dir OUTPUT_DIR
                        The output directory where the model predictions and checkpoints will be written.
  --seed SEED           A seed for reproducible training.
  --resolution RESOLUTION
                        The resolution for input images, all the images in the train/validation dataset will be resized to this resolution
  --center_crop         Whether to center crop images before resizing to resolution
  --color_jitter        Whether to apply color jitter to images
  --train_text_encoder  Whether to train the text encoder
  --train_batch_size TRAIN_BATCH_SIZE
                        Batch size (per device) for the training dataloader.
  --sample_batch_size SAMPLE_BATCH_SIZE
                        Batch size (per device) for sampling images.
  --num_train_epochs NUM_TRAIN_EPOCHS
  --max_train_steps MAX_TRAIN_STEPS
                        Total number of training steps to perform. If provided, overrides num_train_epochs.
  --save_steps SAVE_STEPS
                        Save checkpoint every X updates steps.
  --gradient_accumulation_steps GRADIENT_ACCUMULATION_STEPS
                        Number of updates steps to accumulate before performing a backward/update pass.
  --gradient_checkpointing
                        Whether or not to use gradient checkpointing to save memory at the expense of slower backward pass.
  --lora_rank LORA_RANK
                        Rank of LoRA approximation.
  --learning_rate LEARNING_RATE
                        Initial learning rate (after the potential warmup period) to use.
  --learning_rate_text LEARNING_RATE_TEXT
                        Initial learning rate for text encoder (after the potential warmup period) to use.
  --scale_lr            Scale the learning rate by the number of GPUs, gradient accumulation steps, and batch size.
  --lr_scheduler LR_SCHEDULER
                        The scheduler type to use. Choose between ["linear", "cosine", "cosine_with_restarts", "polynomial", "constant", "constant_with_warmup"]
  --lr_warmup_steps LR_WARMUP_STEPS
                        Number of steps for the warmup in the lr scheduler.
  --use_8bit_adam       Whether or not to use 8-bit Adam from bitsandbytes.
  --adam_beta1 ADAM_BETA1
                        The beta1 parameter for the Adam optimizer.
  --adam_beta2 ADAM_BETA2
                        The beta2 parameter for the Adam optimizer.
  --adam_weight_decay ADAM_WEIGHT_DECAY
                        Weight decay to use.
  --adam_epsilon ADAM_EPSILON
                        Epsilon value for the Adam optimizer
  --max_grad_norm MAX_GRAD_NORM
                        Max gradient norm.
  --push_to_hub         Whether or not to push the model to the Hub.
  --hub_token HUB_TOKEN
                        The token to use to push to the Model Hub.
  --logging_dir LOGGING_DIR
                        [TensorBoard](https://www.tensorflow.org/tensorboard) log directory. Will default to *output_dir/runs/**CURRENT_DATETIME_HOSTNAME***.
  --mixed_precision {no,fp16,bf16}
                        Whether to use mixed precision. Choose between fp16 and bf16 (bfloat16). Bf16 requires PyTorch >= 1.10.and an Nvidia Ampere GPU. Default to
                        the value of accelerate config of the current system or the flag passed with the `accelerate.launch` command. Use this argument to override
                        the accelerate config.
  --local_rank LOCAL_RANK
                        For distributed training: local_rank
  --resume_unet RESUME_UNET
                        File path for unet lora to resume training.
  --resume_text_encoder RESUME_TEXT_ENCODER
                        File path for text encoder lora to resume training.
ほぼDreamBoothと同じですね。
おそらく、DreamBoothのプログラムをベースにしているのでしょう。
そのため、実行コマンドもほぼ変わりません。
そして、利用例となるコマンドは以下のスクリプトに記載されています。
これらを参考にして、次のコマンドを利用します。
accelerate launch train_lora_dreambooth.py `
  --pretrained_model_name_or_path="stabilityai/stable-diffusion-2-1-base"  `
  --instance_data_dir="./training_images" `
  --output_dir="./model" `
  --instance_prompt="lora_irasutoya" `
  --train_text_encoder `
  --resolution=512 --color_jitter `
  --train_batch_size=1 `
  --gradient_accumulation_steps=1 `
  --learning_rate=1e-4 `
  --learning_rate_text=5e-5 `
  --lr_scheduler="constant" `
  --lr_warmup_steps=0 `
  --max_train_steps=30000
正則化画像については、今回は用意しません。
とりあえず、学習画像だけでどれくらいの効果があるのかを確認します。
学習画像は、DreamBoothで用いたモノを流用しています。

DreamBoothとの大きな違いは、以下のオプションです。
--train_text_encoder
これを追加すれば、CLIP用のLoRAモデルも生成されることになります。
追加しないと、Unet用のLoRAモデルだけが生成されます。
あと、学習ステップに注意が必要です。
--max_train_steps=30000
この「30000」は、参考スクリプトの数字をそのまま利用しています。
実際、「30000」を試したところ、2時間20分ほどかかりました。
この時間は、DreamBoothの「8000」と同じぐらいの時間になります。
もちろん、この時間は各自のマシンスペックにより異なることに注意です。
単純に、テスト稼働だけしたい場合は「300」ぐらいのステップ数でも問題ありません。
実際に追加学習した結果は、指定したディレクトリ(今回は「./model」)に保存されます。
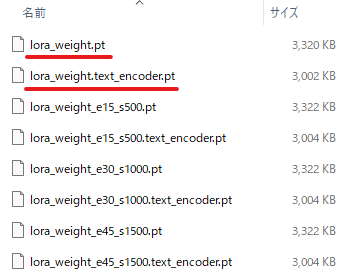
下線のあるモノが、最終成果物(約3MB)です。
500ステップ毎に、それぞれの成果物が保存されています。
以上、LoRAによる追加学習を説明しました。
次は、LoRAによる追加学習の効果を説明します。
LoRAによる追加学習の効果
追加学習の成果を利用して、その効果を確認していきます。
今回であれば、次の2ファイルですね。
- lora_weight.pt
- lora_weight.text_encoder.pt
これらの利用方法は、すでに上げた記事内で説明しています。
上記記事内の方法をベースに、次のコードを用意しました。
これで、LoRAによる追加学習の効果を確認していきます。
import torch
from lora_diffusion import monkeypatch_lora, tune_lora_scale
from diffusers import StableDiffusionPipeline, DPMSolverMultistepScheduler

model_id = "stabilityai/stable-diffusion-2-1-base"
unet_pt = "./model/lora_weight.pt"
text_encoder_pt = "./model/lora_weight.text_encoder.pt"

pipe = StableDiffusionPipeline.from_pretrained(model_id)
pipe.scheduler = DPMSolverMultistepScheduler.from_config(pipe.scheduler.config)
pipe = pipe.to("cuda")

monkeypatch_lora(pipe.unet, torch.load(unet_pt))
monkeypatch_lora(pipe.text_encoder, torch.load(text_encoder_pt), target_replace_module=["CLIPAttention"])

tune_lora_scale(pipe.unet, 1.0)
tune_lora_scale(pipe.text_encoder, 1.0)

prompt = "a boy, lora_irasutoya"

image = pipe(
    prompt,
    num_inference_steps=25,
    guidance_scale=7
).images[0]

image.save("test.png")
次の箇所で指定している数字は、結果を見ながら適当に調整してください。
tune_lora_scale(pipe.unet, 1.0)
tune_lora_scale(pipe.text_encoder, 1.0)
その際に参考となるのは、次のページです。
https://github.com/cloneofsimo/lora/discussions/37
あと、プロンプトには各自で設定した「–instance_prompt」を含める必要があります。
prompt = "a boy, lora_irasutoya"
上記コードを実行した結果、次のような画像が生成されました。
test.png

いらすとや風の画像です。
では、動きを付けてみましょう。
a boy swimming in the river, lora_irasutoya
ここから確認可能。
泳いでいるようには見えませんが、川の中にいるのでOKとしましょう。
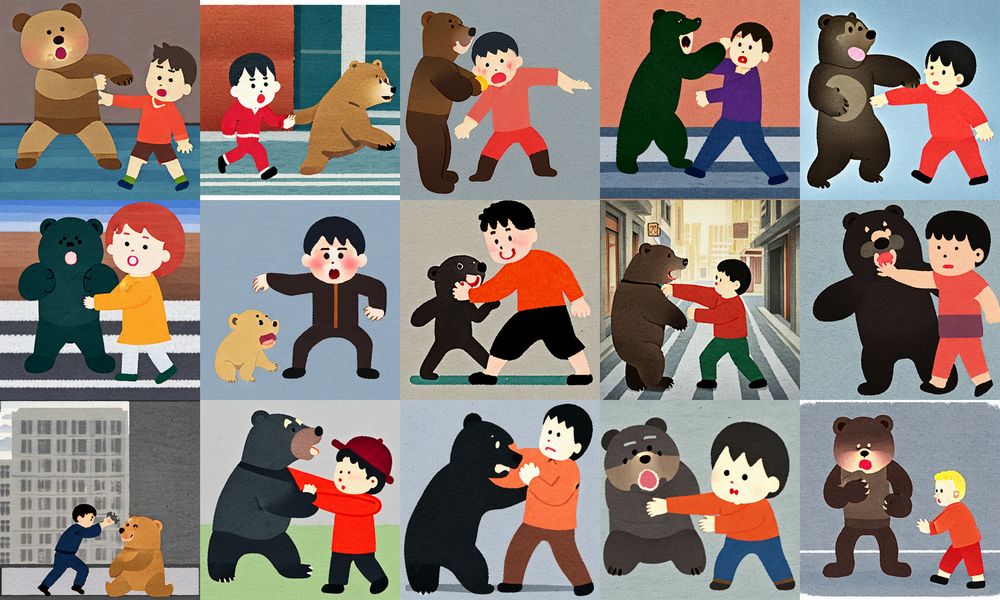
次は、いらすとや風のスタイルでキャラを描いてみましょう。
Iron Man, lora_irasutoya

想像以上にアイアンマンですね。
最後は、人間ではないモノを描画してみましょう。
Totoro in the forest, lora_irasutoya

うーん、微妙ですね。
そもそも、学習画像は人の画像だけでした。
それもたった33枚です。
それを考えれば、ここまで表現できるのはスゴイのかもしれません。
何と言っても、合計でたった6MBのファイルを読み込んだだけですからね。
以上、LoRAによる追加学習の効果を説明しました。
次は、WindowsでLoRAによる追加学習ができない!?を説明します。
WindowsでLoRAによる追加学習ができない!?
Windows環境では、LoRAの追加学習ができない場合があります。
実際、私はできませんでした。
その事象については、次のページで記載されています。
解決方法も提示してあります。
Doesn’t seem to work on Windows
https://github.com/cloneofsimo/lora/issues/4
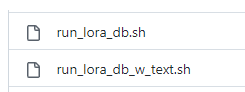
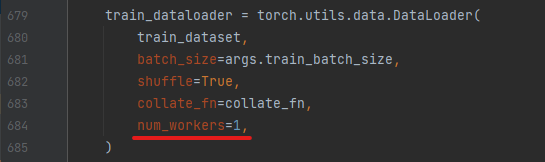
「num_workers」の記述が、Windowsではアウトのようです。
ダウンロードしたリポジトリ以下では、次の2ファイルで記載されています。
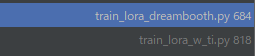
train_lora_dreambooth.pyにありますね。
これを無効にします。
train_lora_dreambooth.py
コメントにするだけです。
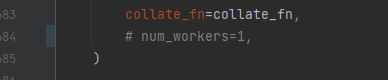
これで、WindowsでもLoRAによる追加学習が可能になります。
以上、WindowsでLoRAによる追加学習ができない!? を説明しました。