「Google Driveにバックアップを自動で保存したい・・・」
「マニュアル通りにしてもGdriveが動かない・・・」
「新規でGdriveがGoogle Driveと連携できなくなった・・・」
このように思う方は、この記事が参考になります。
記事を参考にすれば、バックアップファイルをGoogle Driveに自動で保存できるようになります。
実際、私自身がGdirveをいきなり使えなくなりました。
過去に設定したものは、いまだに動き続けています。
しかし、新規でGdriveがGoogle Driveと連携できなくなったのです。
ちょうど良い機会だということで、rcloneを新規に利用することにしました。
その過程をまとめて、記事にしました。
本記事の内容
- rcloneのインストール
- rcloneの設定
- rcloneによるファイルコピー
では、まずはインストールから説明していきます。
rcloneのインストール
インストール
# aptitude install rclone
The following NEW packages will be installed:
  rclone
0 packages upgraded, 1 newly installed, 0 to remove and 111 not upgraded.
Need to get 2,743 kB of archives. After unpacking 10.9 MB will be used.
Get: 1 http://ftp.jp.debian.org/debian stretch/main amd64 rclone amd64 1.35-1+b3 [2,743 kB]
Fetched 2,743 kB in 0s (2,996 kB/s)
Selecting previously unselected package rclone.
(Reading database ... 51649 files and directories currently installed.)
Preparing to unpack .../rclone_1.35-1+b3_amd64.deb ...
Unpacking rclone (1.35-1+b3) ...
Setting up rclone (1.35-1+b3) ...
Processing triggers for man-db (2.7.6.1-2) ...
aptitudeでもapt-getでもどちらでもOKです。
簡単ですね。
インストールの確認
# rclone version
2020/05/19 10:43:06 Config file "/user/.rclone.conf" not found - using defaults
rclone v1.35-DEV
このコマンドが動けば、インストールは成功しています。
バージョン確認のためのコマンドです。
rcloneの設定
設定
# rclone config
No remotes found - make a new one
n) New remote
s) Set configuration password
q) Quit config
n/s/q> n
新しくリモート設定を登録します。
「n」を入力してEnter。
name> google-backup
リモート設定の名称ですね。
適当に管理しやすい名称を入力してください。
「〇〇〇」を入力してEnter。
Type of storage to configure.
Choose a number from below, or type in your own value
1 / Amazon Drive
   \ "amazon cloud drive"
2 / Amazon S3 (also Dreamhost, Ceph, Minio)
   \ "s3"
3 / Backblaze B2
   \ "b2"
4 / Dropbox
   \ "dropbox"
5 / Encrypt/Decrypt a remote
   \ "crypt"
6 / Google Cloud Storage (this is not Google Drive)
   \ "google cloud storage"
7 / Google Drive
   \ "drive"
8 / Hubic
   \ "hubic"
9 / Local Disk
   \ "local"
10 / Microsoft OneDrive
   \ "onedrive"
11 / Openstack Swift (Rackspace Cloud Files, Memset Memstore, OVH)
   \ "swift"
12 / Yandex Disk
   \ "yandex"
Storage> 7
ストレージのタイプを選択です。
Google Driveを利用するため、「7」を入力してEnter。
Google Application Client Id - leave blank normally.
client_id>
Google Application Client Secret - leave blank normally.
client_secret>
ここは何も入力せずにEnter、EnterでOKです。
Remote config
Use auto config?
* Say Y if not sure
* Say N if you are working on a remote or headless machine or Y didn't work
y) Yes
n) No
y/n> n
「ブラウザを自動的に起動させてよいかどうかを確認している」と思っても問題ありません。
この記事では、サーバーが対象であるため「n」を入力してEnter。
サーバーのバックアップファイルをGoogle Driveに転送するパターンなら、「n」を選択。
If your browser doesn't open automatically go to the following link: https://accounts.google.com/o/oauth2/auth?client_id=aaaaaaaaaaaaaa.apps.googleusercontent.com&redirect_uri=urn%3Aietf%3Awg%3Aoauth%3A2.0%3Aoob&response_type=code&scope=https%3A%2F%2Fwww.googleapis.com%2Fauth%2Fdrive&state=aaaaaaaaaaaaaa
Log in and authorize rclone for access
上記のようなURL(aaaaaaaaaaaaaaはランダムな文字列です)が表示されます。
このURLにブラウザでアクセスします。
ブラウザは、ターミナルを起動しているPCでも、別のPCでも大丈夫です。
複数アカウントがある場合は、次のアカウント選択画面が表示されます。
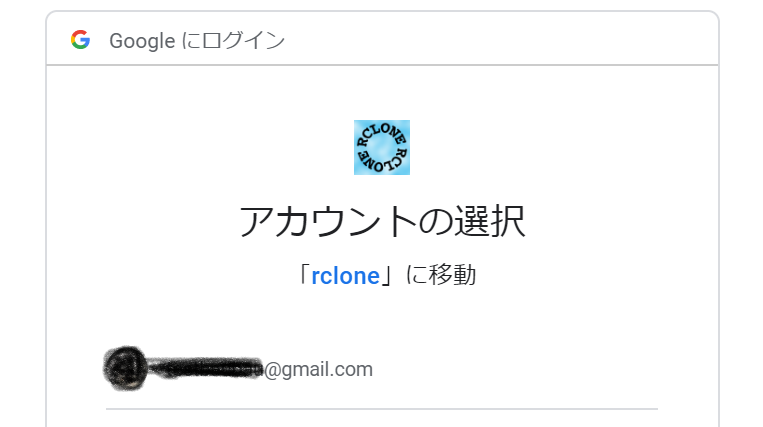
アカウントを選択したら、次の画面が表示。
rcloneによるGoogle Driveへのアクセスの許可確認画面ですね。
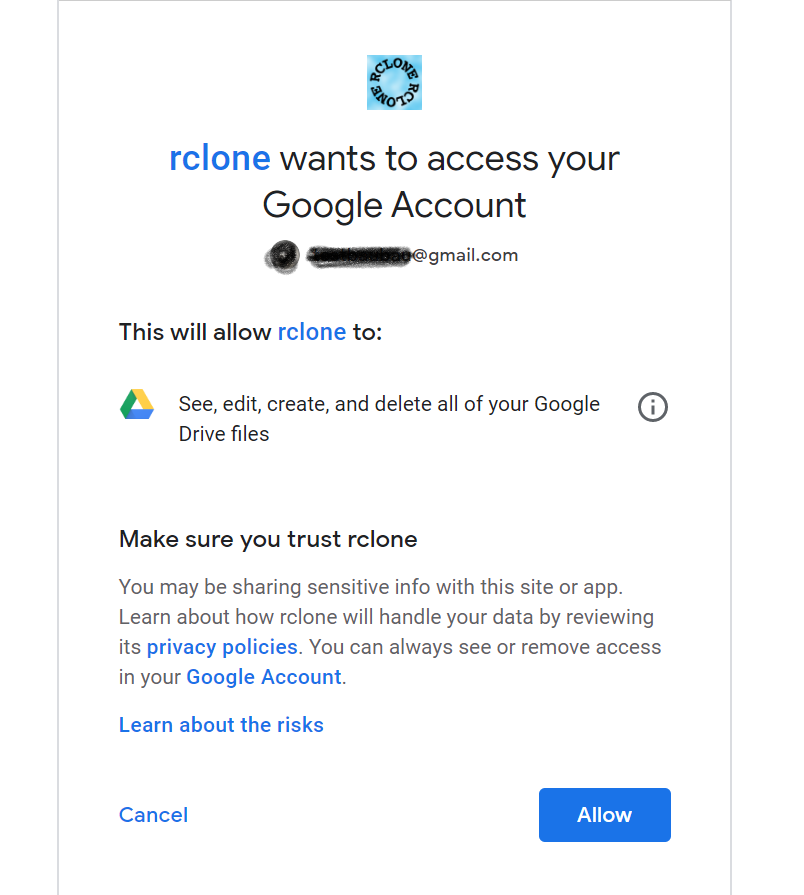
「Allow」ボタンをクリック。
認証コードが記載された画面が表示されます。
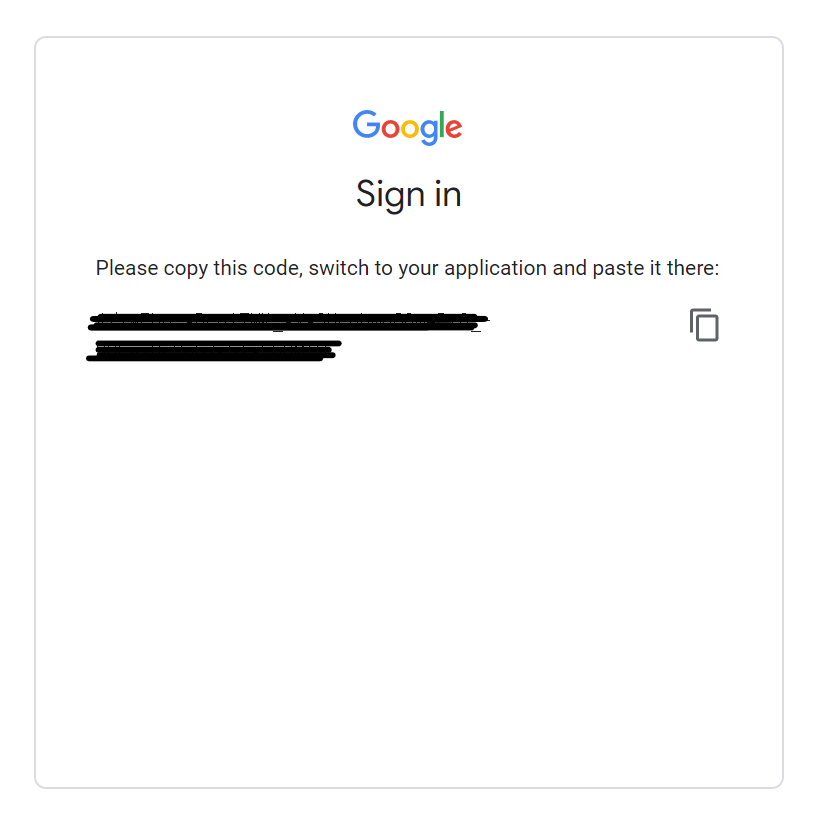
認証コードをコピーします。
アイコンをクリックすれば、選択状態になってコピーしやすいです。
認証コードをコピーしたら、ターミナルに戻ります。
Enter verification code> ランダムな文字列
コピーした認証コードをは入力してEnter。
--------------------
[google-backup]
client_id =
client_secret =
token = {"access_token":"●●●","token_type":"Bearer","refresh_token":"●●●","expiry":"2020-05-19T12:28:24.70694885+09:00"}
--------------------
y) Yes this is OK
e) Edit this remote
d) Delete this remote
y/e/d> y
設定の確認です。
問題なければ、「y」を入力してEnter。
Current remotes:

Name                 Type
====                 ====
google-backup        drive

e) Edit existing remote
n) New remote
d) Delete remote
s) Set configuration password
q) Quit config
e/n/d/s/q> q
設定完了です。
とりあえず、一旦rcloneを終わらせるため「q」を入力してEnter。
設定確認(Google Driveとの接続確認)
次のコマンドにより、登録したリモート設定を確認できます。
rclone lsd リモート設定の名称:/
Google Drive上のフォルダ一覧(マイドライブ直下)が表示されます。
これが表示されれば、設定は成功しています。
もしフォルダがなければ、これを機会にGoogle Drive上で作成しておきましょう。
今回は、「BACKUP」というフォルダを作成します。
# rclone lsd google-backup:
          -1 2020-05-19 03:50:02        -1 BACKUP
こんな感じで作成したフォルダが出てきます。
rcloneによるファイルコピー
ファイルコピー
rcloneを使えば、次のことが可能です。
- サーバーからGoogl Driveにファイルをコピー
- Google Driveからサーバーにファイルをコピー
バックアップには、「 サーバーからGoogl Driveにファイルをコピー」で対応します。
これを実現するのは、以下のコマンド。
rclone copy target remote:
targetは、サーバー上にあるバックアップしたいファイルです。
remote:は、リモート設定+Google Drive上のコピー先フォルダの組み合わせです。
具体的な情報は以下。
| サーバーのバックアップファイル | /tmp/self_development.tar.gz |
| コピー先リモート設定 | google-backup |
| コピー先フォルダ | BACKUP |
コピーする前に、コピー前の状況を確認しておきます。
# rclone ls google-backup:/BACKUP/
何も表示されないです。
Google Drive上で見てもファイルが一つも存在していませんね。
では、コピーします。
# rclone copy /tmp/self_development.tar.gz google-backup:/BACKUP/
2020/05/19 13:22:34 Google drive root 'BACKUP': Waiting for checks to finish
2020/05/19 13:22:34 Google drive root 'BACKUP': Waiting for transfers to finish
2020/05/19 13:22:46
Transferred:   123.801 MBytes (9.343 MBytes/s)
Errors:                 0
Checks:                 0
Transferred:            1
Elapsed time:       13.2s
成功したようです。
それでは、確認してみます。
# rclone ls google-backup:/BACKUP/
129815210 self_development.tar.gz
ちゃんとファイルが存在しているようですね。
一応、Google Drive上も確認します。
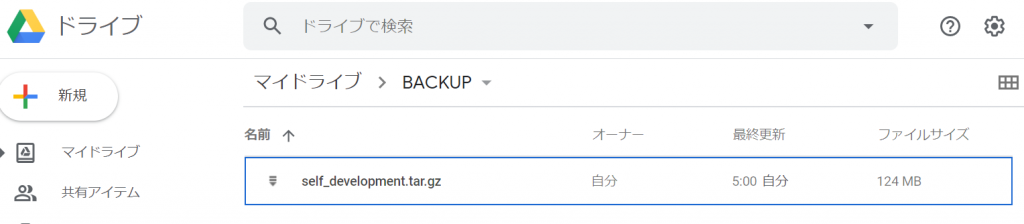
大丈夫ですね。
対象ファイルが、コピーされているのが確認できます。
コピーの自動設定
cronで設定します。
1点だけ注意があります。
rcloneコマンドをフルパスで書かないといけません。
# which rclone
/usr/bin/rclone
上記をそのまま信用せず、各自の環境でwhichコマンドで確認するべきです。
次の記述をcronに設定すれば、自動バックアップの完成です。
/usr/bin/rclone copy /tmp/self_development.tar.gz google-backup:/BACKUP/
まとめ
rcloneによるGoogle Driveへのファイルコピーを説明してきました。
この場合のファイルコピーは、ほぼバックアップファイルの転送がメインです。
インストールは、簡単でした。
設定は、ターミナルとブラウザを行き来するところで、少し困惑するかもしれません。
でも、慣れれば何てことはありません。
コピーも簡単でした。
今回は、詳しく説明していませんが、もちろん逆も可能です。
逆とは、Google Driveからサーバーへのファイルコピーです。
これは、ファイルをリカバーするときに役立つでしょう。