
この記事では、Windows上でUbuntuを動かす方法を解説しています。
そして、Windows 10だけが対象ということもありません。
Windows 7~Windows 10までどのバージョンでもOKです。
さすがに、XPやVistaは諦めてください。
本記事の内容
- VagrantとVirtualBoxでUbuntuの仮想環境を構築
- Windows上でUbuntuを動かすための事前準備
- 【コマンド2つ】Windows上でUbuntuを動かす
- Ubuntuの起動確認
それでは、上記に沿って解説していきます。
VagrantとVirtualBoxでUbuntuの仮想環境を構築
仮想環境は、探せばいろいろと出てきます。
しかし、性能や拡張性に関してまで検討し出すとキリがありません。
そこで仮想環境を決めるポイントを狭めます。
「Ubuntuが簡単にWindows上で動く」
ただし、Windowsは7でも10でも。
このポイントにまで狭めると、選択肢も狭まります。
結果的には、「VagrantとVirtualBox」を採用しました。
決め手は、「たった2つのコマンド」です。
準備が整えば、たった2つのコマンドでUbuntuを起動できるのです。
なお、VirtualBoxは仮想環境を構築するソフトウェアとなります。
ただし、VirtualBoxで仮想環境を構築する設定が面倒です。
その面倒な設定を引き受けてくれるのが、Vagrantということです。
では、さっそく2つのコマンドを試していきたいと思います。
ただ、その前に準備ですね。
Windows上でUbuntuを動かすための準備
行う準備は、以下の3つ。
- VirtualBoxのインストール
- Vagrant(ベイグラント)のインストール
- Hyper-Vの無効化
それぞれを説明していきます。
VirtualBoxのインストール
仮想環境を構築するためのソフトウェアです。
インストールに関しては、次の記事と解説しています。

インストール自体は、流れ作業です。
ただし、マシンスペックにだけは注意しましょう。
Vagrant(ベイグラント)のインストール
仮想環境構築を手伝ってくれます。
インストールに関しては、次の記事をご覧ください。

手伝いと言っても、Vagrantがメインです。
Vagrantありきで、VirtualBoxを選択しています。
なぜなら、Ubuntuを「たった2つのコマンド」で起動できるからです。
Vagrantの公式サイトでも、それがアピールされています。
Hyper-Vの無効化
Hyper-Vは、マイクソフトが提供する仮想化システムです。
Windows 8のPro以降で標準提供されています。
Windows 7や各バージョンのHomeでは、提供されていないということです。
例えば、Windows 10 Homeは「Hyper-Vの無効化」をする必要はありません。
このHyper-VとVirtualBoxは一緒に動かしてはいけません。
Hyper-Vを有効にしてVirtualBoxのVMを起動しようとするとブルースクリーンになるらしいです。
そのHyper-Vを無効化する方法は、以下のコマンドをPowershellで実行することです。
Disable-WindowsOptionalFeature -Online -FeatureName Microsoft-Hyper-V-All
これは、別にHyper-Vだけの問題ではありません。
仮想環境を構築するソフトウェアは、2つ以上は同時に有効にしないことです。
【コマンド2つ】Windows上でUbuntuを動かす
コマンドを実行する前に、コマンドプロンプト(DOS窓)かPowerShellを起動します。
どっちでもいいです。
あと、仮想環境を構築するディレクトリに移動しておいてください。
私の環境では、C:\soft\vagrantに移動しました。
まずは、Vagrantの初期化を行います。
1つ目のコマンドは、以下。
vagrant init ubuntu/bionic64
実行して、上手くいくと次のように表示されます。
C:\soft\vagrant> vagrant init ubuntu/bionic64
A `Vagrantfile` has been placed in this directory. You are now
ready to `vagrant up` your first virtual environment! Please read
the comments in the Vagrantfile as well as documentation on
`vagrantup.com` for more information on using Vagrant.
コマンドを実行したディレクトリに、「Vagrantfile」という名前のファイルが作成されます。
設定ファイルのようなモノになります。
次は、仮想マシン(環境)を起動します。
2つ目のコマンドは、以下。
vagrant up
実行すると、いろいろと表示されます。
環境によりますが、結構時間はかかると考えたほうがよいでしょう。
Ubuntuをダウンロードして、インストールまでしている訳ですから。
と言っても、私の環境では5分もかかりませんでした。
インストール中の表示をすべて載せておきます。
これを見れば、Vagrantが何をしているのかをある程度わかると思います。
C:\soft\vagrant>vagrant up
Bringing machine 'default' up with 'virtualbox' provider...
==> default: Box 'ubuntu/bionic64' could not be found. Attempting to find and install...
    default: Box Provider: virtualbox
    default: Box Version: >= 0
==> default: Loading metadata for box 'ubuntu/bionic64'
    default: URL: https://vagrantcloud.com/ubuntu/bionic64
==> default: Adding box 'ubuntu/bionic64' (v20201119.0.0) for provider: virtualbox
    default: Downloading: https://vagrantcloud.com/ubuntu/boxes/bionic64/versions/20201119.0.0/providers/virtualbox.box
Download redirected to host: cloud-images.ubuntu.com
    default:
==> default: Successfully added box 'ubuntu/bionic64' (v20201119.0.0) for 'virtualbox'!
==> default: Importing base box 'ubuntu/bionic64'...
==> default: Matching MAC address for NAT networking...
==> default: Checking if box 'ubuntu/bionic64' version '20201119.0.0' is up to date...
==> default: Setting the name of the VM: vagrant_default_1605945086680_15935
Vagrant is currently configured to create VirtualBox synced folders with
the `SharedFoldersEnableSymlinksCreate` option enabled. If the Vagrant
guest is not trusted, you may want to disable this option. For more
information on this option, please refer to the VirtualBox manual:

  https://www.virtualbox.org/manual/ch04.html#sharedfolders

This option can be disabled globally with an environment variable:

  VAGRANT_DISABLE_VBOXSYMLINKCREATE=1

or on a per folder basis within the Vagrantfile:

  config.vm.synced_folder '/host/path', '/guest/path', SharedFoldersEnableSymlinksCreate: false
==> default: Clearing any previously set network interfaces...
==> default: Preparing network interfaces based on configuration...
    default: Adapter 1: nat
==> default: Forwarding ports...
    default: 22 (guest) => 2222 (host) (adapter 1)
==> default: Running 'pre-boot' VM customizations...
==> default: Booting VM...
==> default: Waiting for machine to boot. This may take a few minutes...
    default: SSH address: 127.0.0.1:2222
    default: SSH username: vagrant
    default: SSH auth method: private key
    default: Warning: Connection aborted. Retrying...
    default:
    default: Vagrant insecure key detected. Vagrant will automatically replace
    default: this with a newly generated keypair for better security.
    default:
    default: Inserting generated public key within guest...
    default: Removing insecure key from the guest if it's present...
    default: Key inserted! Disconnecting and reconnecting using new SSH key...
==> default: Machine booted and ready!
==> default: Checking for guest additions in VM...
    default: The guest additions on this VM do not match the installed version of
    default: VirtualBox! In most cases this is fine, but in rare cases it can
    default: prevent things such as shared folders from working properly. If you see
    default: shared folder errors, please make sure the guest additions within the
    default: virtual machine match the version of VirtualBox you have installed on
    default: your host and reload your VM.
    default:
    default: Guest Additions Version: 5.2.42
    default: VirtualBox Version: 6.1
==> default: Mounting shared folders...
    default: /vagrant => C:/soft/vagrant
これで、Ubuntuの仮想環境が構築されました。
そして、この時点でもうUbuntuは起動しています。
たった、2つのコマンドによってです。
面倒な設定は、Vagrantが自動でやってくれました。
上記表示を見る限り、ネットワークやセキュリティ部分をやってくれていますね。
さて、では最後に確認を行います。
Ubuntuの起動確認
Ubuntuが起動していることをまだ確認はできていません。
実際、SSHでUbuntuにアクセスしてみましょう。
まず、仮想環境を構築したディレクトリに移動します。
「Vagrantfile」を作成した場所ですね。
私の場合は、C:\soft\vagrantでした。
ここで次のコマンドを実行します。
vagrant ssh
実行します。
C:\soft\vagrant>vagrant ssh
Welcome to Ubuntu 18.04.5 LTS (GNU/Linux 4.15.0-124-generic x86_64)

* Documentation:  https://help.ubuntu.com
* Management:     https://landscape.canonical.com
* Support:        https://ubuntu.com/advantage

  System information as of Sat Nov 21 08:01:50 UTC 2020

  System load:  0.0               Processes:             94
  Usage of /:   10.6% of 9.63GB   Users logged in:       0
  Memory usage: 12%               IP address for enp0s3: 10.0.2.15
  Swap usage:   0%  Usage of /:   10.6% of 9.63GB   Users logged in:       0
  Memory usage: 12%               IP address for enp0s3: 10.0.2.15
  Swap usage:   0%

0 packages can be updated.
0 updates are security updates.

New release '20.04.1 LTS' available.
Run 'do-release-upgrade' to upgrade to it.
これで仮想環境のUbuntuにSSHでアクセスできています。
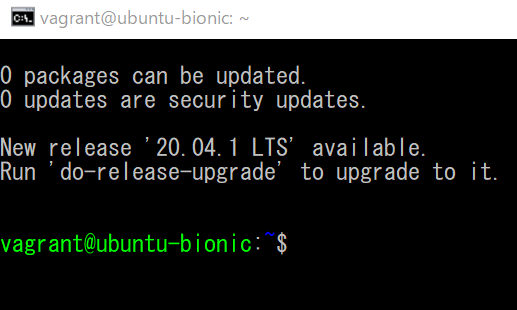
実際、上記のようにUbuntuにログインした状態になりました。
OSを確認しましょう。
vagrant@ubuntu-bionic:~$ cat /etc/lsb-release
DISTRIB_ID=Ubuntu
DISTRIB_RELEASE=18.04
DISTRIB_CODENAME=bionic
DISTRIB_DESCRIPTION="Ubuntu 18.04.5 LTS"
Ubuntuの18.04.5ですね。
いやー、これは簡単です。
今後、バリバリとこの環境を利用していきたいと思います。
実際のサーバーでやると、無茶ができないですからね。
一旦、Ubuntuから抜けておきます。
vagrant@ubuntu-bionic:~$ logout
Connection to 127.0.0.1 closed.
なお、仮想環境を停止させるのは以下のコマンドです。
vagrant halt
実行すると、次のように表示されます。
C:\soft\vagrant>vagrant halt
==> default: Attempting graceful shutdown of VM...
整理しておきます。
「Vagrantfile」のあるディレクトリへ移動。
起動なら、vagrant up
停止なら、vagrant halt
これだけ覚えていれば、とりあえずは大丈夫だと思います。